AI Overview
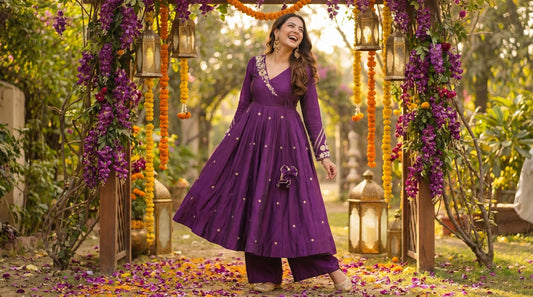
Lehenga dupatta draping refers to the various methods of wearing a dupatta with a lehenga, each creating a different visual effect and suitable for different occasions and activities. The eight main styles are: traditional single shoulder drape, double shoulder drape, bridal head drape, wraparound belt style, single pallu drape, cape drape, arm loop, and one-sided cascade. The most important practical reality is that almost all draping styles require at least one safety pin to function beyond twenty minutes — an unpinned dupatta requires constant adjustment and photographs poorly. The head drape is most appropriate for the main wedding ceremony; the belt wrap and arm loop are most appropriate for dancing-focused functions like sangeet.
Key Takeaways
- Pinning is not optional — it is the difference between a dupatta that works and one that doesn't: Every draping style except the arm loop needs at least one pin; small flat safety pins at the shoulder seam or blouse strap hold any draping style for hours without appearing in photographs.
- The same dupatta draped differently reads as an entirely different outfit: Head drape signals ceremony and tradition; belt wrap signals sangeet and dancing; cape drape signals reception entrance and fashion-forward intent — the fabric is the same; the draping is the transformation.
- The most photographically dramatic styles are the least practical for long days: Cape drape and head drape create extraordinary photographs but require active management — plan to change draping style between the ceremony, meal, and dancing portions of the event.
- Dupatta weight determines which styles are available: Heavy embellished dupattas cannot do the belt wrap or one-sided cascade cleanly — they are limited to shoulder and head draping styles that distribute weight across a larger area.
- Dancing requires a different draping decision: For any function that involves dancing, eliminate the head drape, double shoulder drape, and cape drape — replace with belt wrap or arm loop before reaching the dance floor.
The dupatta gets chosen last. Almost always.
You spend time on the lehenga skirt — the silhouette, the embellishment, the weight of the fabric. You spend time on the blouse — the neckline, the back cut, the sleeve length. The dupatta arrives as an afterthought, or as a matched accessory that came with the set, or as something you grabbed because the colour worked.
Then you get to the event and spend the entire evening adjusting it.
This is the dupatta problem. Not the fabric, not the embellishment — the draping. Because how you wear the dupatta determines whether it looks considered or chaotic, formal or casual, ceremonial or contemporary. The same dupatta draped over the head reads as a bride at her ceremony. The same dupatta wrapped at the waist reads as someone at a sangeet who knows exactly what she is doing. The same dupatta looped over one arm reads as effortlessly festive.
Three entirely different visual statements. One piece of fabric.
The styles are learnable. So is knowing when each one actually works — and when it quietly fails.
The One Thing Nobody Tells You Before They List the Styles
Most dupatta draping styles require pinning to function beyond the first twenty minutes.
This is the reality that how-to videos understate. The model stands still, looks beautiful, and the dupatta appears to stay in place. What the video doesn't show is the six pins and two hair grips holding everything together.
Before you decide on a style, decide on your approach to pinning. A dupatta pinned securely takes minutes of adjustment during a full wedding day. An unpinned dupatta of any draping style takes constant attention and appears in photographs with the slightly dishevelled quality of something mid-slide.
Good small safety pins — flat, small, ideally in gold or silver matching your outfit — are one of the most useful things you can put in your bridal or function bag. They are invisible in photographs and they are what separates a dupatta that works from one that doesn't.
Now the styles.
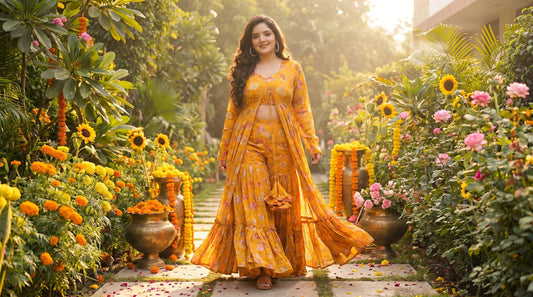
Style 1: The Traditional Single Shoulder Drape
What it is: The dupatta is placed or pinned over the left shoulder. The front section hangs across the front of the body; the tail falls behind the left shoulder and trails.
How to do it:
Place the dupatta midway across the left shoulder so equal lengths hang in front and behind. Secure with one pin at the shoulder seam or blouse strap. The front length can be tucked into the waistband for a cleaner line, or left to fall naturally.
When to use it: Traditional ceremonial occasions — puja, ring ceremony, roka, formal family gatherings. Also the default style for wedding guests who want to look appropriately dressed without managing a complex draping style all day.
The honest note: This is the most forgiving style precisely because it is the simplest. One pin at the shoulder holds it indefinitely. The front fabric trails naturally and looks good whether you are sitting, standing, or moving through a function.
Roohani Wedding Wearability Index™: 9/10 — Works for almost every duration, every function type, every dupatta weight.
Style 2: The Double Shoulder Drape
What it is: The dupatta is draped across both shoulders simultaneously, with lengths falling forward on both sides and framing the face symmetrically.
How to do it:
Centre the dupatta behind your neck so the fabric is distributed equally on both shoulders. Both front ends fall in front of the body. Pin at both shoulder points to the blouse straps. The front ends can be left to trail or pinned loosely at the waist.
When to use it: Main wedding ceremony, engagement ceremony, very formal religious functions. This is the most symmetrically formal of all draping styles — it signals occasion, ceremony, and tradition simultaneously.
The honest note: This style requires a dupatta with sufficient width — at least 110 centimetres — to sit properly across both shoulders without looking pulled. A narrow dupatta in this style looks squeezed. Also: because both front ends fall in front of your body, this style restricts arm movement slightly. That is acceptable for a ceremony where you are largely still. It is not the right choice for a function where you need to move freely.
Roohani Wedding Wearability Index™: 7/10 — Formal, correct, and beautiful. Not for dancing or long active days.
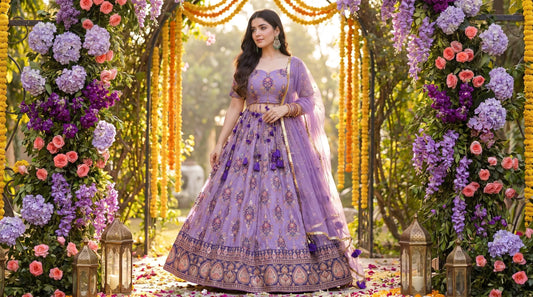
Style 3: The Bridal Head Drape
What it is: The dupatta is brought over the crown of the head and trails down the back, with the front sections falling symmetrically on both sides of the face.
How to do it:
This style cannot be improvised on the day. Plan it with your hairstylist in advance. The dupatta needs to be pinned into the hairstyle — typically at the crown and at the hairline — using hair pins and sometimes small dupatta pins along the parting. The weight of the dupatta on the head will gradually pull a hairstyle forward if not secured correctly.
The front sections should fall just past the face, not cover it. The back section trails behind or is brought over one shoulder for the procession.
When to use it: Main wedding ceremony. Almost exclusively bridal — a wedding guest wearing a head-draped dupatta at the ceremony is making a strong style choice that reads, in most contexts, as over-dressed for a guest.
The honest note: This is the most photographically powerful of all draping styles. Every bridal portrait you have ever seen with a dupatta framing the face is this style. It is also the most demanding to manage. The weight of an embellished dupatta on the head — over several hours — causes hairstyles to move, neckaches in some women, and requires the bride to be more conscious of head position than any other style.
If you are wearing a head drape: plan your hairstyle specifically for it, rehearse with your hairstylist, and understand that this style is for the ceremony, not necessarily for the full reception after.
Roohani Wedding Wearability Index™: 6/10 — Stunning for the ceremony. Difficult beyond two to three hours.
Style 4: The Wraparound Belt Style
What it is: The dupatta is gathered lengthwise and wrapped around the waist, functioning visually as a belt or sash. The ends can be tucked at the back, knotted at the front, or left with a small trailing end at the side.
How to do it:
Gather the full length of the dupatta along its width, creating a long, thick band of fabric. Wrap it once or twice around the waist at the position of a belt. Tuck the ends into the gathered fabric at the back, or tie a simple knot at the front for a more deliberate style statement.
When to use it: Sangeet, mehendi, cocktail functions, any event where dancing is part of the evening. The belt wrap keeps the dupatta entirely out of the way of movement while maintaining the festive visual of the fabric.
The honest note: This only works beautifully with lightweight dupattas — chiffon, soft georgette, thin net. A heavily embellished or stiff dupatta will not gather cleanly and will create a lumpy, thick belt that sits awkwardly at the waist. If your dupatta is heavy, this is not your style.
It also works best when the waist section of your lehenga is in a colour or design that the dupatta can complement. If the waistband is already heavily embellished, adding a gathered dupatta over it creates visual noise rather than style.
Roohani Wedding Wearability Index™: 9/10 for dancing-focused functions. 4/10 for traditional ceremonies.
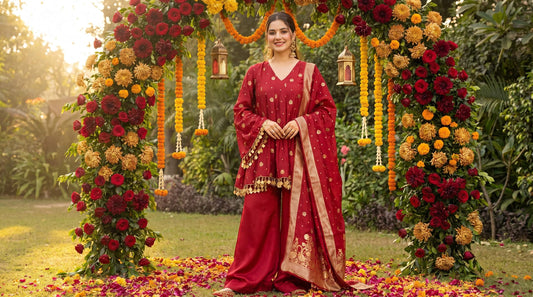
Style 5: The Single Pallu Drape
What it is: The dupatta is tucked at the right waistband, brought diagonally across the front of the body, and thrown over the left shoulder, with the tail falling behind. It mimics the pallu of a sari.
How to do it:
Tuck approximately 30 centimetres of one end into the right waistband — securely enough that it won't pull out when you move. Bring the remaining length diagonally across the front of your body from right to left, gathering it slightly in the hand. Bring it over and behind the left shoulder. Pin at the left shoulder. The tail falls behind.
When to use it: Semi-formal functions, mehendi ceremonies, events where you want to look elegant without the formality of a traditional drape. This style also works particularly well for wedding guests.
The honest note: The diagonal line created by this draping style is visually flattering across almost every body type — it draws the eye from lower right to upper left in a movement that creates the impression of height and length. This is the geometry that makes a sari pallu so universally appealing, and the same principle applies here.
The limitation: this style requires a dupatta of sufficient length to go from waistband to shoulder with a visible diagonal. Short dupattas cannot do it.
Roohani Wedding Wearability Index™: 8/10 — Elegant, manageable, and flattering.
Style 6: The Cape Drape
What it is: Both front corners of the dupatta are brought to the front of each shoulder and pinned. The entire body of the dupatta hangs behind the wearer — trailing like a floor-length cape.
How to do it:
Hold the dupatta by both of its short edges. Bring these edges to the front of each shoulder and pin securely to the blouse strap or shoulder seam. The entire central body of the dupatta now falls behind you.
When to use it: Receptions, entrance moments, grand arrival photographs. This is a style for photographs, not for function.
The honest note: Be clear-eyed about this one. It is extraordinarily beautiful in photographs — the trailing fabric behind you reads as fashion-forward and dramatic, particularly in motion shots. In actual practice, it is impractical across a full evening. The cape drape gets caught on chairs, dragged across floors, stepped on by other people, and is physically awkward to manage while eating, hugging relatives, or moving through a crowded venue.
Use it for the entrance walk, the official photographs, and the reception line. Then pin it differently for the rest of the evening.
Roohani Wedding Wearability Index™: 3/10 for functionality. 10/10 for the photographs.
Style 7: The Arm Loop
What it is: The dupatta is looped once over one forearm and carried. The most casual of all dupatta styles.
How to do it:
Fold the dupatta in half lengthwise. Loop it once over the left forearm and let both ends trail.
When to use it: Mehendi, casual sangeet, daytime functions, events where movement is constant and managing a draped dupatta is genuinely impractical.
The honest note: This is not a styled drape so much as a practical acknowledgment that the dupatta needs to be present without being in the way. It works for exactly those moments. It is not formal enough for a main wedding ceremony, and it will look underdressed at events where other guests are in full draping styles.
Think of the arm loop as festive rather than ceremonial. It says "I'm celebrating and moving freely" rather than "I'm observing tradition."
Roohani Wedding Wearability Index™: 8/10 for casual festive functions. 2/10 for ceremonies.
Style 8: The One-Sided Cascade
What it is: The dupatta is gathered entirely at one shoulder and pinned, allowing the full length to cascade down one side of the body. The other side of the outfit is fully visible without dupatta.
How to do it:
Gather the full width of the dupatta at the right shoulder. Pin securely — this style requires more than one pin because the entire weight is concentrated at a single point. Allow the gathered and cascading fabric to fall down the left side of the body from shoulder to floor.
When to use it: Solo portrait photography, entrance walks, moments where you want an asymmetric, editorial-looking photograph. The asymmetry of this style photographs beautifully.
The honest note: Lightweight, fluid dupattas — chiffon, soft georgette — do this style beautifully. The fabric falls in long, natural folds that look intentional. Heavy embellished dupattas concentrated at one shoulder create an uncomfortable weight imbalance and tend to pull the shoulder of the blouse downward over time.
This is also a style that reads as very modern. It is not traditional in most regional contexts. At a formal religious ceremony, it might feel out of place; at a reception or designer-event function, it is a strong choice.
Roohani Wedding Wearability Index™: 7/10 — Great for photography-driven moments, limited for long functional days.
The Dupatta Management Reality
There are five things the styling articles skip that actually determine whether any draping style succeeds.
The weight problem: Heavy embellished dupattas cannot do most draping styles cleanly. They are made for the traditional shoulder or head drape — styles that distribute their weight across a large area or into a hairstyle. If your dupatta is heavily embellished net or thick tissue, your practical style options are narrowed to styles 1, 2, and 3.
The pinning problem: Every style except the arm loop needs at least one pin. Most need two or three. Decide in advance where you will pin, what pins you will use, and who — your hairstylist, your mother, yourself — will be responsible for securing the dupatta before the event begins.
The photography problem: What looks best in static photographs and what survives a full function day are often different things. Head drape: extraordinary in photographs, demanding across hours. Belt wrap: completely practical for dancing, invisible in formal photographs. Choose based on what your day actually requires, not just on what you want in photographs.
The dancing problem: If you intend to dance — at sangeet, at reception, at any function with music — eliminate styles 2, 3, and 6 from your evening's repertoire. Replace them with the belt wrap or arm loop before you hit the dance floor.
The venue problem: Outdoor garden functions in humid weather make lightweight, simple draping styles the practical choice. Long flowing drapes in a crowded indoor venue are constantly at risk of being stepped on.
Conclusion
The dupatta is the most versatile element of a lehenga set and the one that receives the least deliberate attention in most outfit planning. Understanding that a single dupatta can deliver eight meaningfully different visual effects — each appropriate for a different moment in the wedding day — turns the dupatta from a management problem into a styling tool. Plan your draping by occasion segment rather than choosing one style for the entire day. Carry flat safety pins. Brief your hairstylist on head draping requirements in advance. And remember that the styles which photograph best are not always the styles which function best across eight hours — the most considered approach is to use both kinds of knowledge deliberately, switching styles as the day's requirements change.
Our Bridal Lehenga Guide
How To Style Ethnic Wear For Wedding Functions
Lehenga Types and Silhouettes Comparison
Previous
Bridal Lehenga Guide: How to Choose One You Can Actually Wear for a Full Wedding Day
Next
Sharara Suits for Weddings: Why They Solve the Problem That Lehengas Create